Note: This is human-written content. The logic described here has been tested and does not come from any “AI fantasy.” I hope you find insight and value for yourself or your organization. Enjoy reading.
Summary: Second part of the series on the ticket system with Microsoft 365 and Power Automate. You can find the first part here: Simple Ticket System with Microsoft Forms, Planner & Power Automate – Step-by-Step to a Quick Ticket Solution in Microsoft 365
Starting Point and Target Picture
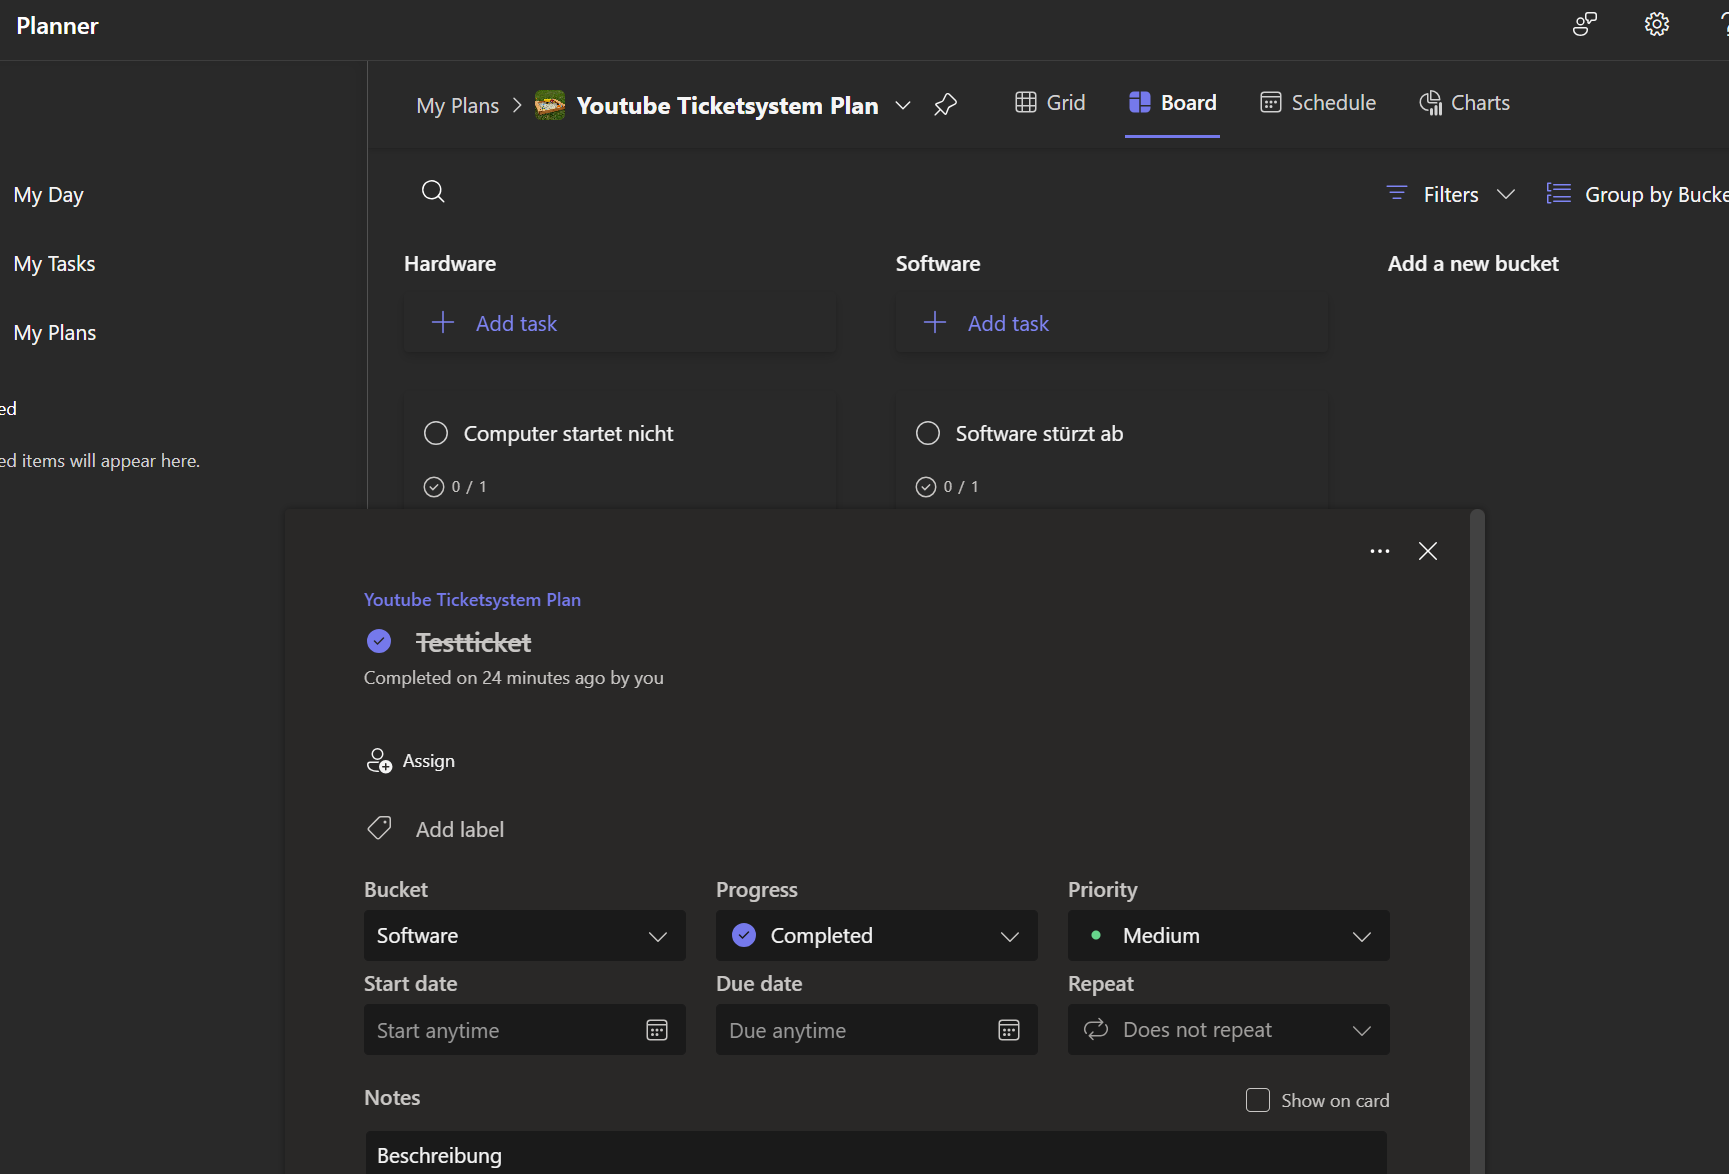
In the first part of this series, a small ticket system was built using Microsoft Forms and Microsoft Planner. The logic was implemented in Power Automate. To ensure communication with requesters, the submitted email address was stored in the first checklist item of the Planner task.
In this second part, we add a small SharePoint list. Its purpose is to store the requester’s email and a reference status. This enables two new features:
- The checklist can be used to its full extent.
- Status changes can be detected. Requesters can thus be informed about changes to the ticket status, e.g., “the ticket is now in progress.”
The SharePoint List
To create a SharePoint list, navigate to a suitable SharePoint site (e.g., office.com) → Apps → SharePoint → one of your SP sites. Under “Site Contents,” you can create a new list.
For this example, I created a list called “Planner-Ticketsystem-Referenz” with the following columns:
- Title (default title, created automatically with the list)
- Email (Text)
- Status Reference (Text)
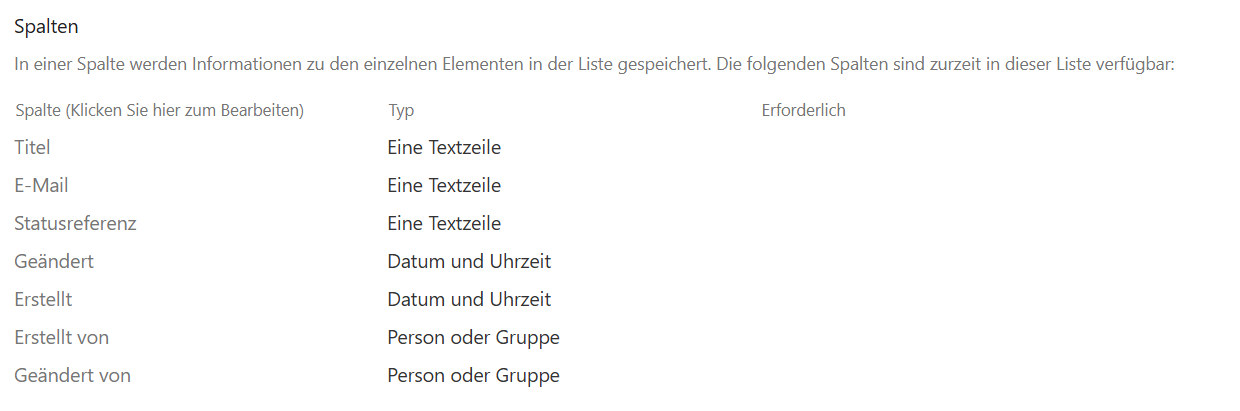
Columns of the SharePoint list.
Adjusting Power Automate Flow “YT_Ticketsystem_neues_Ticket”
In the previous part, the flow “YT_Ticketsystem_neues_Ticket” was created. It will now be extended to write the requester’s email and the last known status into the reference list.
The following steps are required:
- Delete the action “Update task detail” and
- Add a “Create Item” action to insert the reference entry into the SharePoint list.
Action: Create item
To add the new action, search for the connector “SharePoint” and select the action “Create item.”
Configure the action as follows:
- Site Address: Address of your SharePoint site (dropdown)
- List Name: The newly created list
- Title: The ID of the newly created Planner task (from the “Create a Task” action)
- Email: The email of the submitting user (Responder’s Email from the trigger)
The completed action should look like this:
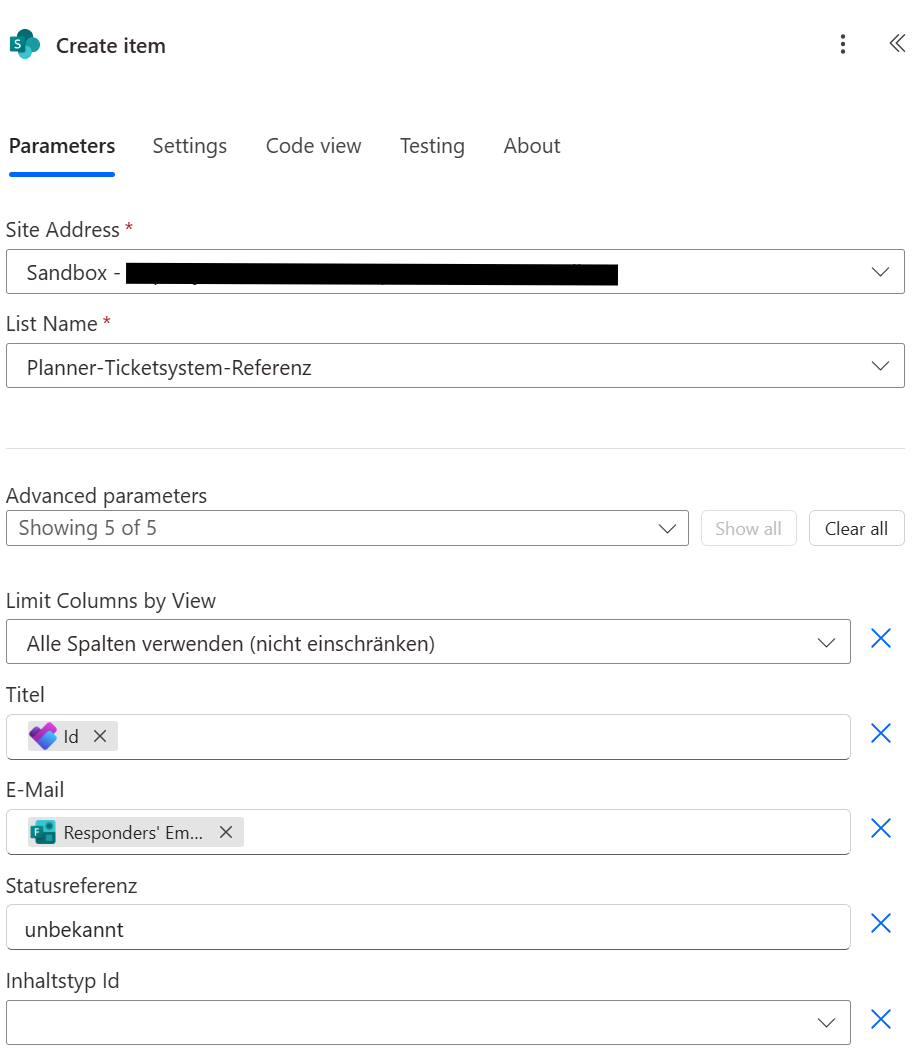
The new ‘Create item’ action
Schematic overview:
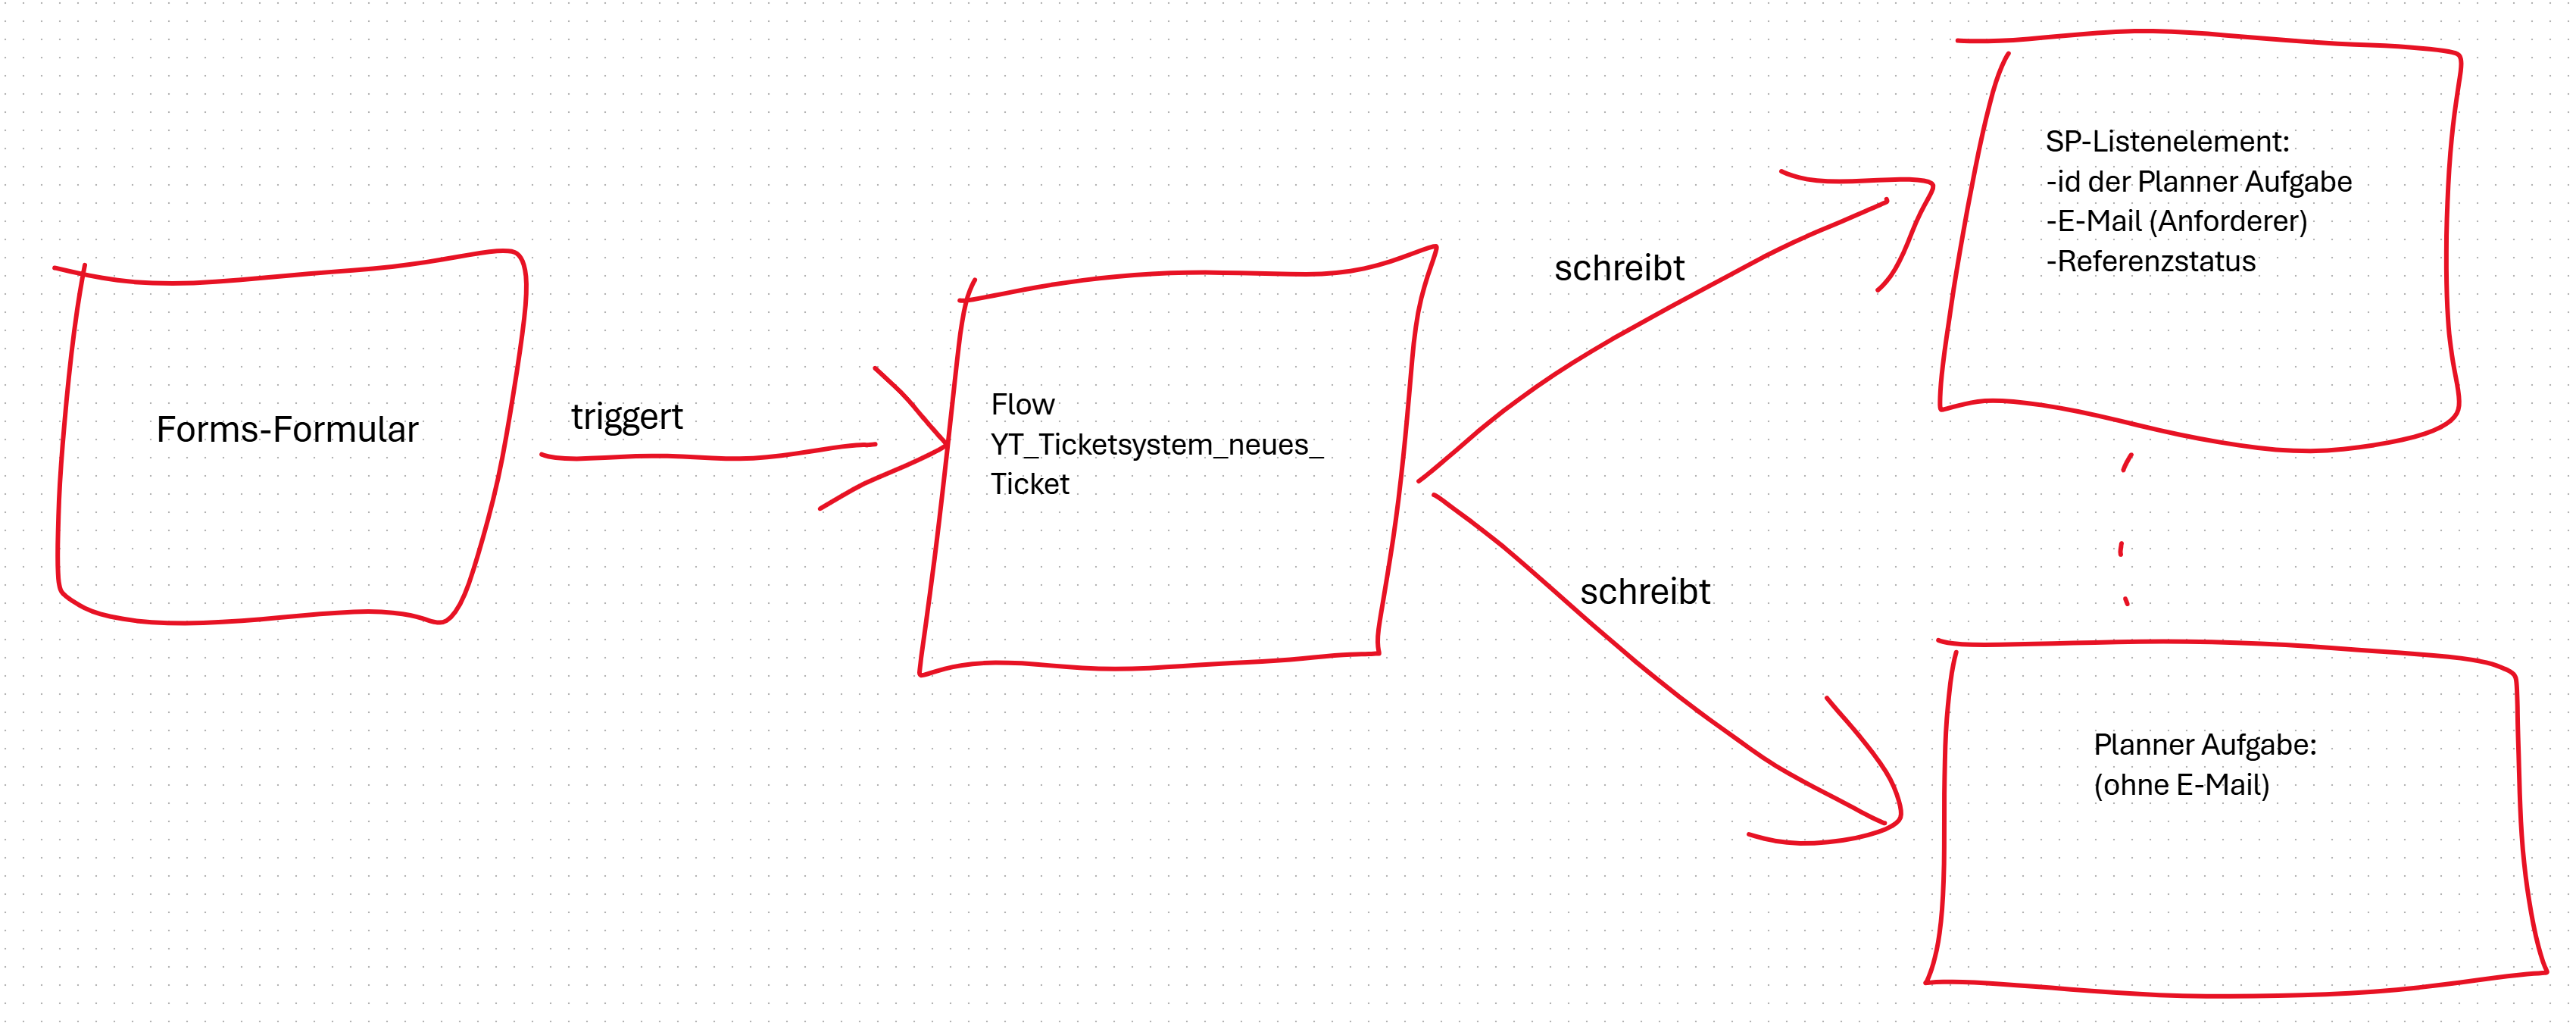
Creating a new ticket
- The Forms form is submitted and triggers the Power Automate flow.
- The flow creates both the Planner task and the SharePoint list item. The list item contains a reference to the Planner task.
An initial entry in the SharePoint list:
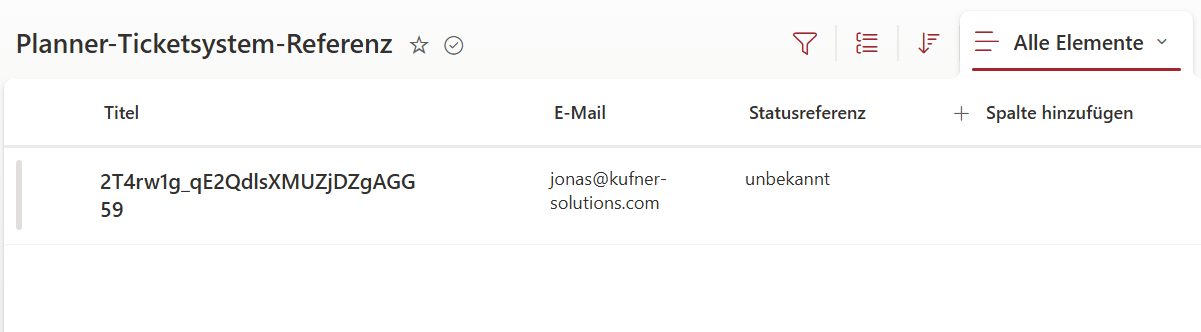
An initial entry in the SharePoint list. The status reference ‘unknown’ is intentional to detect deviations from the actual status.
Adjusting Flow “YT Ticketsystem_Abschluss”
To communicate with requesters upon ticket completion in Planner, the flow “YT Ticketsystem_Abschluss” must be modified:
- Add a “Get items” action.
- Reference the requester’s email (for the Teams message) from the first item returned by “Get items.”
Action: Get items
“Get items” retrieves the SharePoint list entries from the newly created list. To return only the relevant item, an OData query filter must be added:
OData filter:
Title eq '@{outputs('Get_task_details')?['body/id']}'
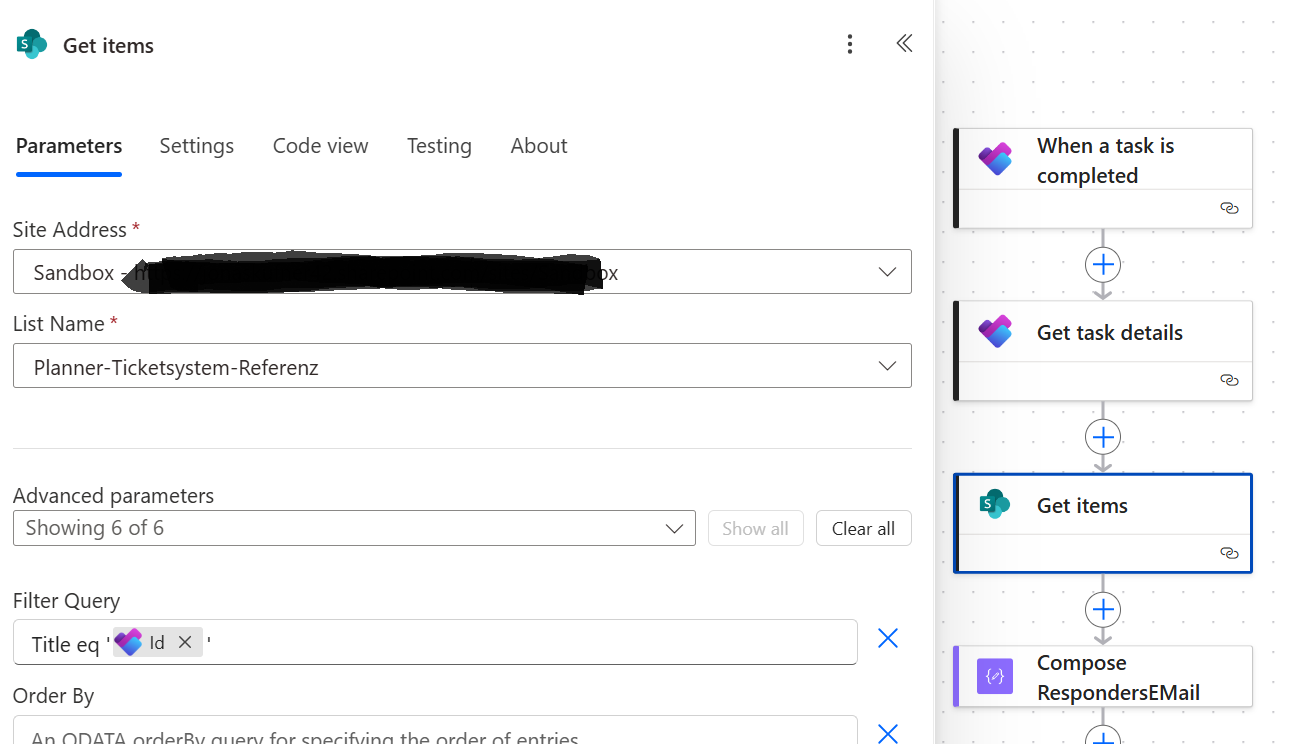
The new ‘Get items’ action
Action: “Get user profile (V2)”
The above-mentioned action retrieves the requesting user from Azure AD. The retrieved information (display name and email) is then used to send a message to the requesting user.
To reference the email from the SharePoint list, enter the following expression in the action (field User (UPN)):
body('Get_items')?['value'][0]['E_x002d_Mail']
This expression references the first element [0] from the array “value” in the body of the “Get items” action.
Expression input example:

Expression for retrieving the user’s email
Summary
The second part of the series on creating a simple ticket system with Microsoft 365 and Power Automate introduced SharePoint as an additional component. It supports the following features:
- The checklist in the Planner task can now be fully used again.
- The foundation for monitoring status changes (e.g., from “new ticket” to “ticket in progress”) is now established.
Outlook
In the third part of this series, the mentioned status monitoring will be implemented. This will allow users to be informed about actions related to their ticket (e.g., “ticket is now in progress,” “there are questions about your ticket,” etc.).