The Example
I want to demonstrate how Relate Rows works with a small example:
There are two tables: Albums and Songs, where Songs has a lookup to the Albums table.

The relationship between Album and Song
The Flow
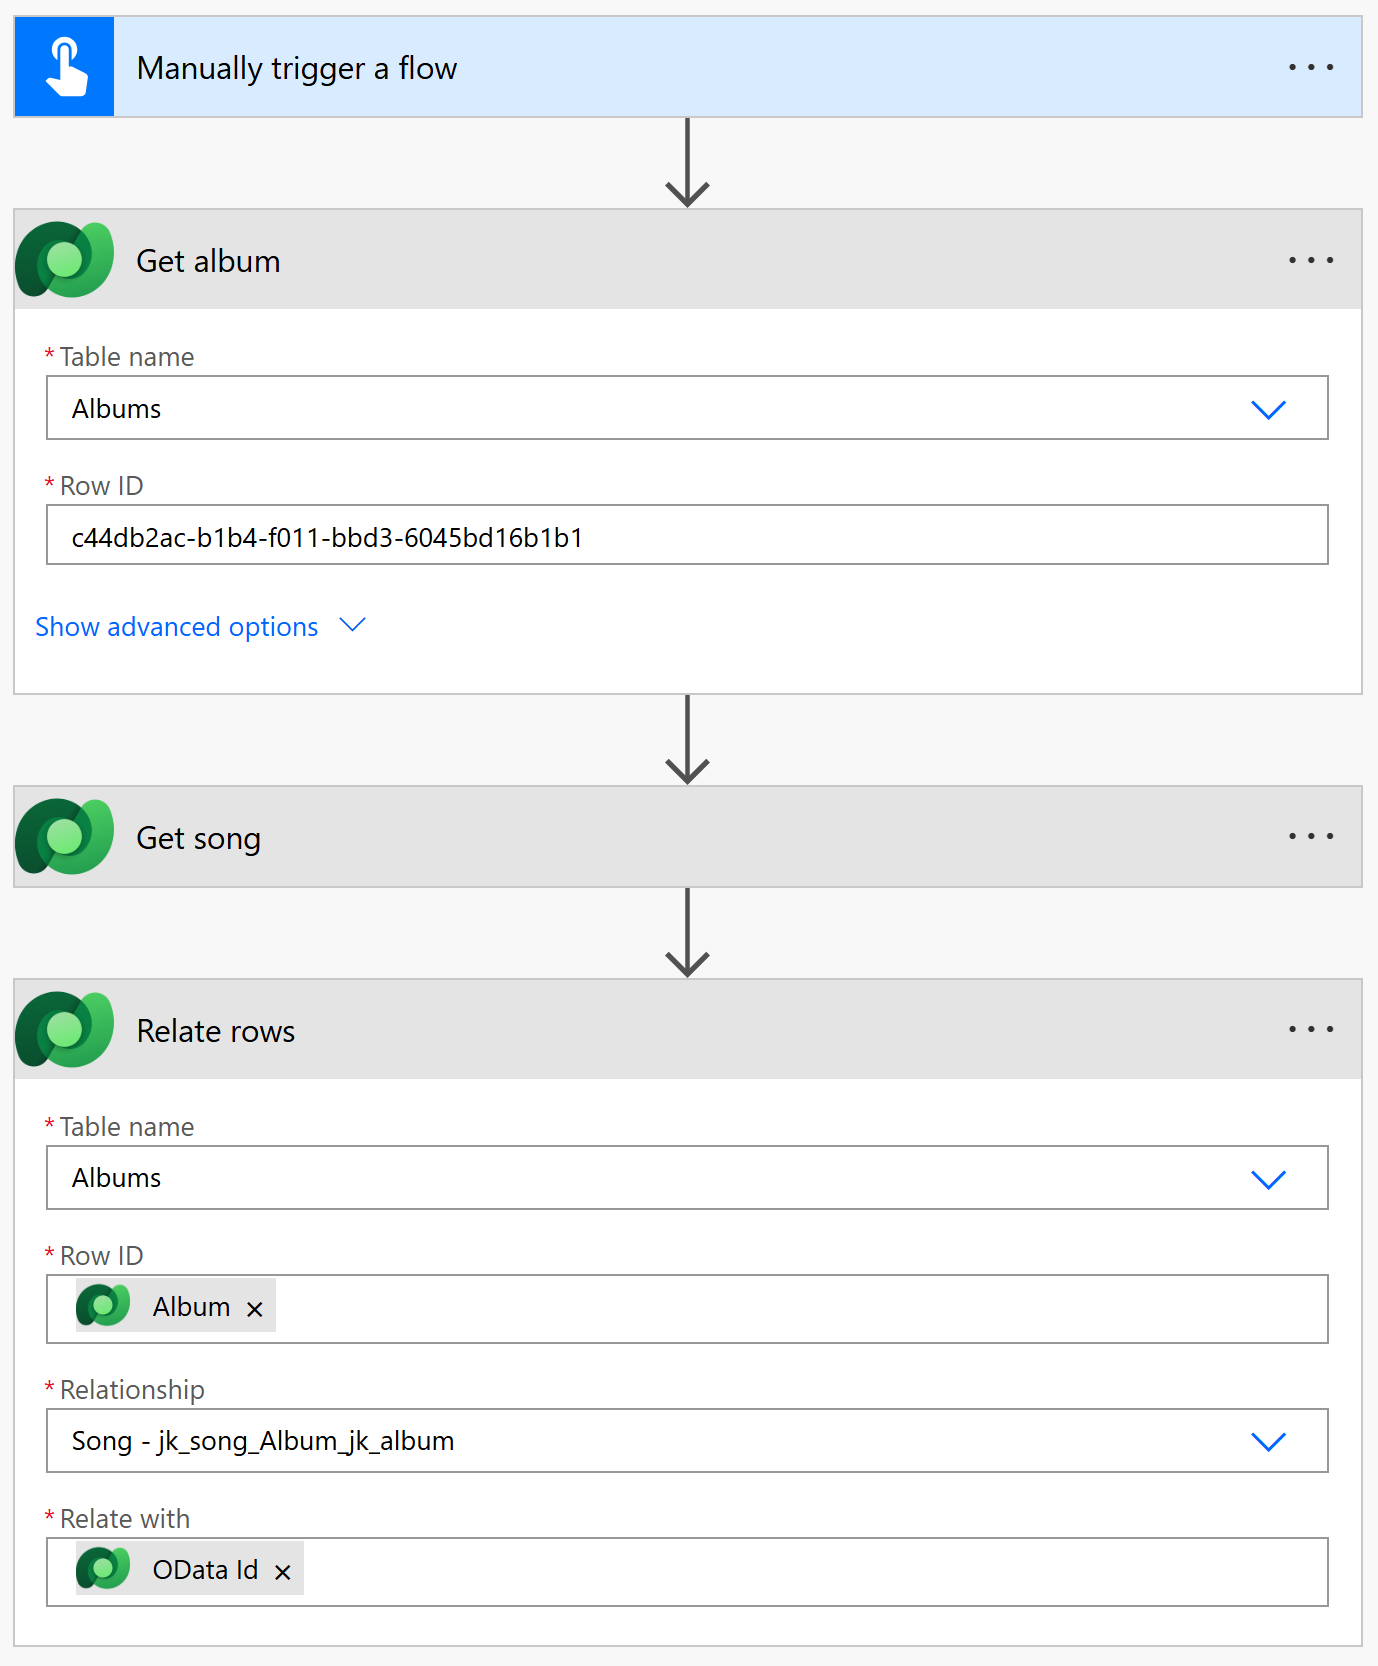
The flow linking Album and Song
In the flow, the album and then the song are first loaded using their respective IDs.
After that, the link is created using the Relate rows action.
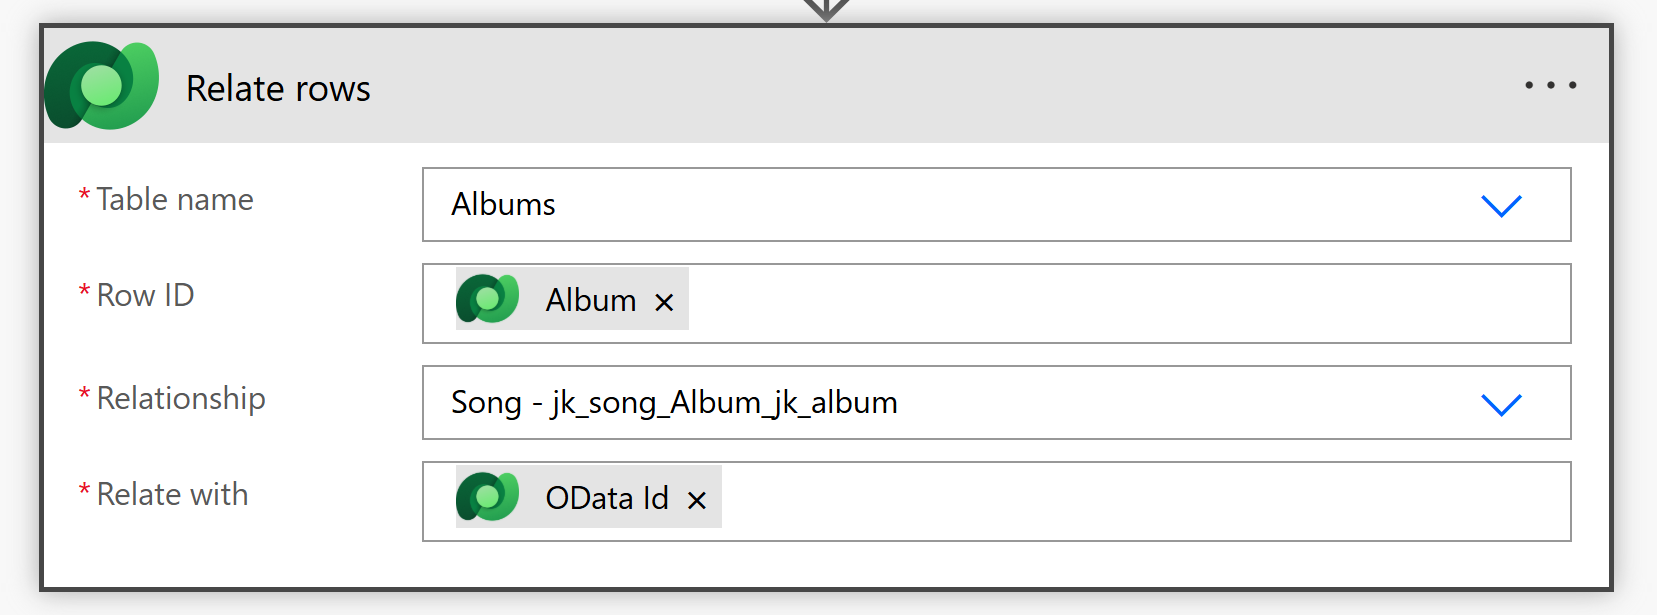
Action: Relate Rows
The Relate Rows action has three parameters:
- Table name: Select the independent entity here — in our example, Album.
- Row ID: Here, choose the ID of the row from the first table. The ID (or unique identifier) is usually named after the table. For example: Album (unique identifier). In the background, it’s exactly the Row ID shown above (“c44db2ac…b1b1”).
- Relationship: Choose the relationship that was automatically created when the lookup column was added. Example: Songs - jk_songs_Album_jk_album (“jk” refers to the publisher in my development environment).
- Relate with: Enter the OData Id (not the Id) of the dependent entity (in this example: Songs).
With this approach, the linking works reliably. Important points to remember:
- Always select the independent entity first (for a 1:n relationship, that’s the “1”).
- For Row ID, use the unique identifier of the independent entity.
- For Relate with, use the OData Id, not the unique identifier.