
Digital Vacation Planning with Approval Workflow – Efficient, Transparent, and License-Free
If vacation planning in your company still happens in Excel or on paper, now is the perfect time to switch to a modern, digital solution.
In this post, I’ll show you step by step how to build a complete vacation planning and approval workflow using SharePoint, Power Apps, and Power Automate.
The best part:
You’ll be able to download the finished solution from my blog later (under Downloads).
This solution is particularly suitable for IT departments, HR teams, and managers who need a structured, traceable, and scalable vacation management system.
Components of the Solution
The solution consists of three core components:
- SharePoint lists as the data model
- Power App as the user interface
- Power Automate flow for calculation and approval process
SharePoint Lists
1. List “Vacation” (Employee Overview)
This list manages:
- Employees
- Contractual vacation days
- Planned vacation
- Approved vacation
Fields:
- Employee (Person – unique values recommended)
- Workdays (Number)
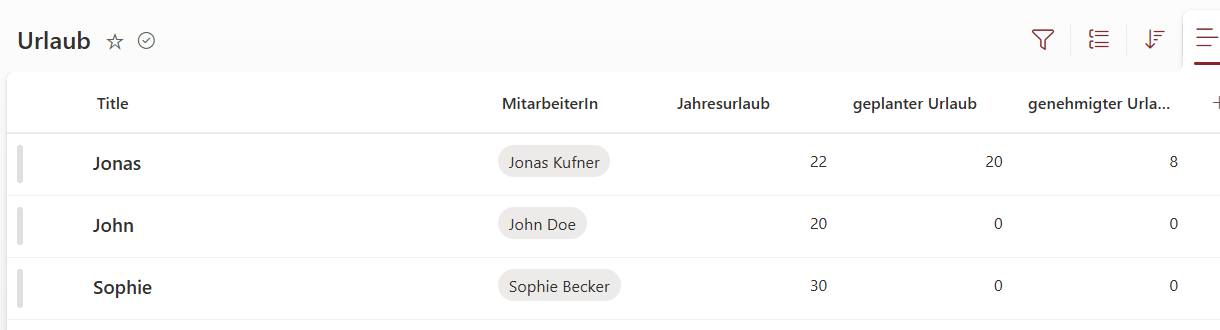
The SharePoint list ‘Vacation’
2. List “Vacation Planning” (Requests)
This list stores individual vacation requests.
Fields:
- Title
- Start Date
- End Date
- Optional: Status
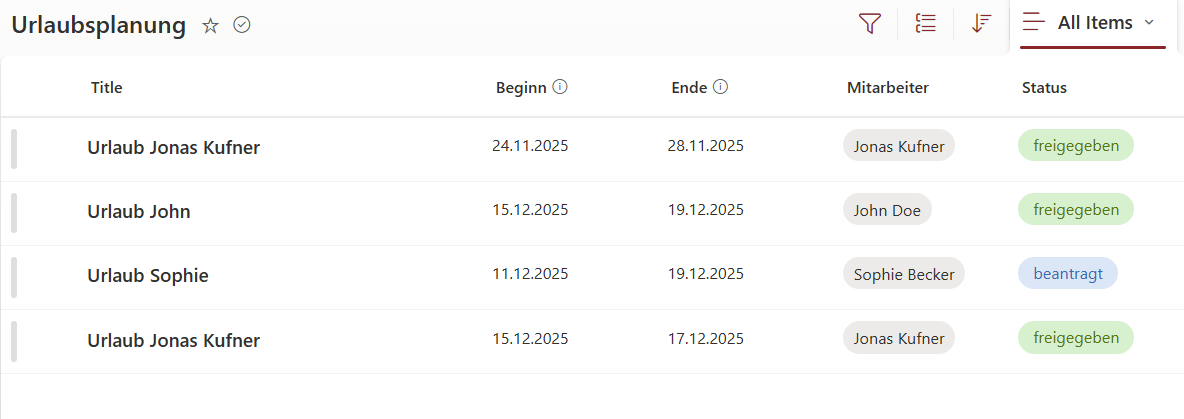
The SharePoint list ‘Vacation Planning’
Create the Power App
The app is generated directly from the SharePoint list.
Menu:
Integrate → Power Apps → Create an app
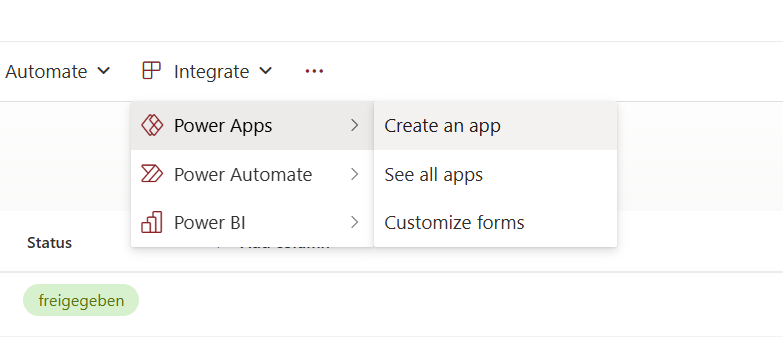
Creating the Power App directly from the SharePoint list
Customizing the Power App
1. Default Status “Requested”
In the Status dropdown control, set the DefaultSelectedItems property to:
[ { Value: "beantragt" } ]
2. Automatically Fill the Employee Field
Set a user object as the default for the Employee field:
{
  '@odata.type': "#Microsoft.Azure.Connectors.SharePoint.SPListExpandedUser",
  Claims: "i:0#.f|membership|" & User().Email,
  DisplayName: User().FullName,
  Email: User().Email
}

User object in DefaultSelectedItems
3. Automatic Title
Example:
"Vacation " & User().FullName
4. Remove Attachments
The “Attachments” field is removed entirely from the form.
5. Hide Unnecessary Fields
Use the Visible property to hide fields that are not needed for submitting a vacation request.
6. Display Status in Browse Screen
Add a text field in the gallery that displays:
ThisItem.Status.Value
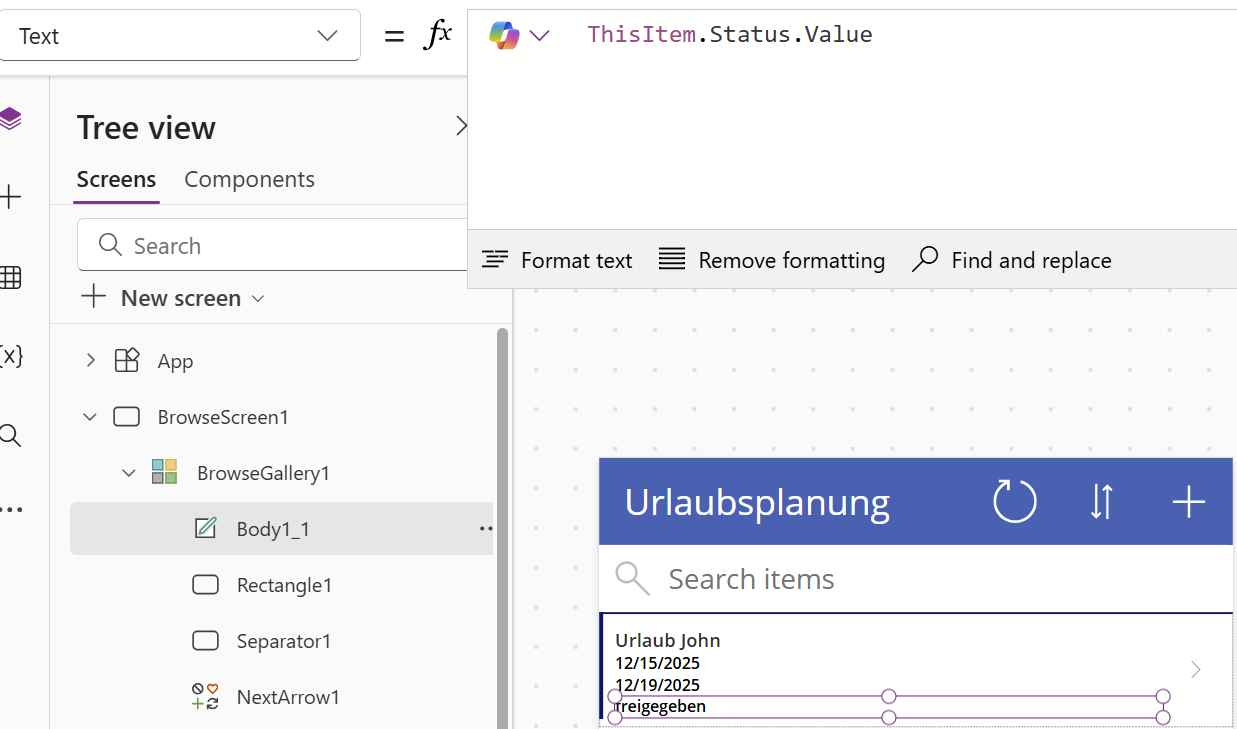
New text field for Status in the Browse Gallery
Power Automate Flow
The flow handles:
- Calculating vacation days
- Manager approval process
- Updating the vacation list
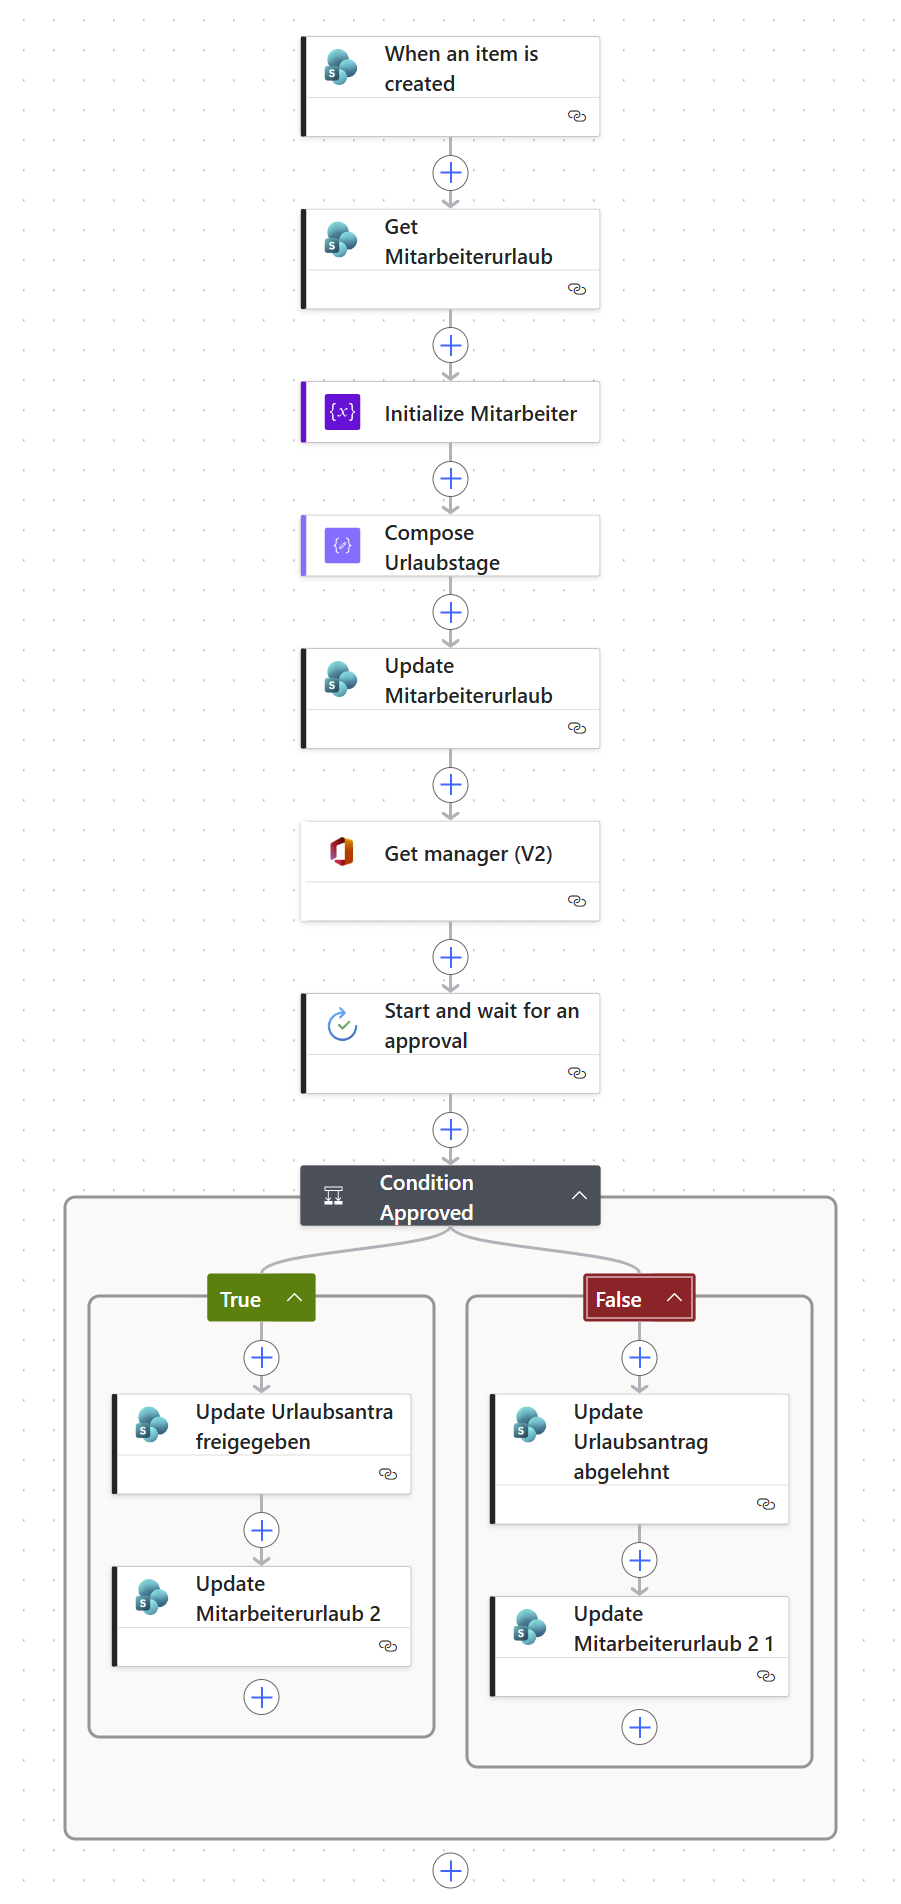
Power Automate flow for vacation planning and approval
Trigger
The flow is triggered when an item is created in the Vacation Planning list.
Step 1: Retrieve Employee Data
The matching row from the Vacation list is filtered using an OData query:
Mitarbeiter/Email eq '@{triggerOutputs()?['body/Author/Email']}'

Action to retrieve employee vacation data
Step 2: Store Employee Object in Variable
The retrieved row is stored in an object variable for easier access later.
Step 3: Calculate Number of Vacation Days
Formula for calculating vacation days:
div( sub( ticks(outputs('Begin')), ticks(outputs('Ende')) ), 864000000000 )
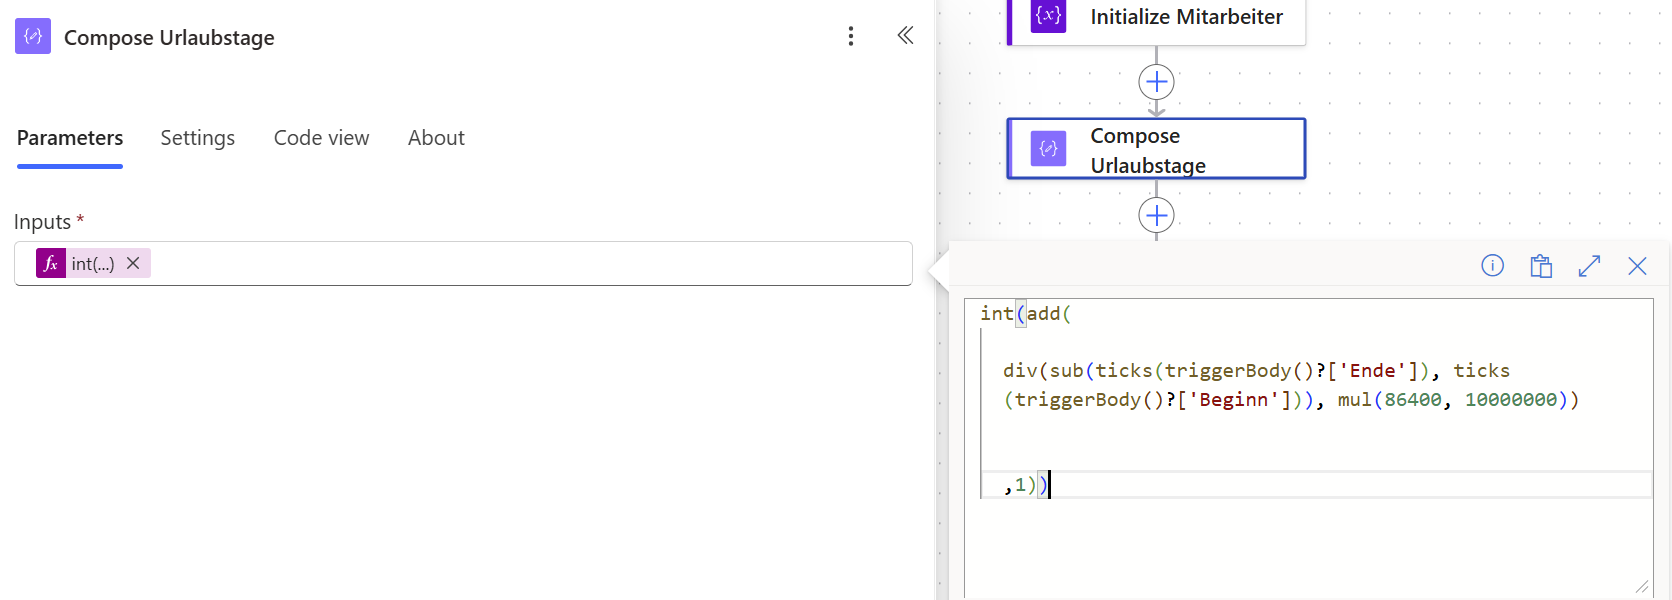
Calculation of vacation days between start and end dates
Step 4: Update Planned Vacation
New planned vacation value:
add( variables('MitarbeiterObjekt')?['geplanterUrlaub'], outputs('Compose_Urlaubstage') )
Step 5: Determine Manager
Use the “Get Manager (V2)” action to retrieve the requester’s manager.
Step 6: Send Approval Request
Use “Start and wait for an approval” to notify the supervisor.
Approval check:
@if(equals(outputs('Approval')?['outcome'], 'Approve'), true, false)
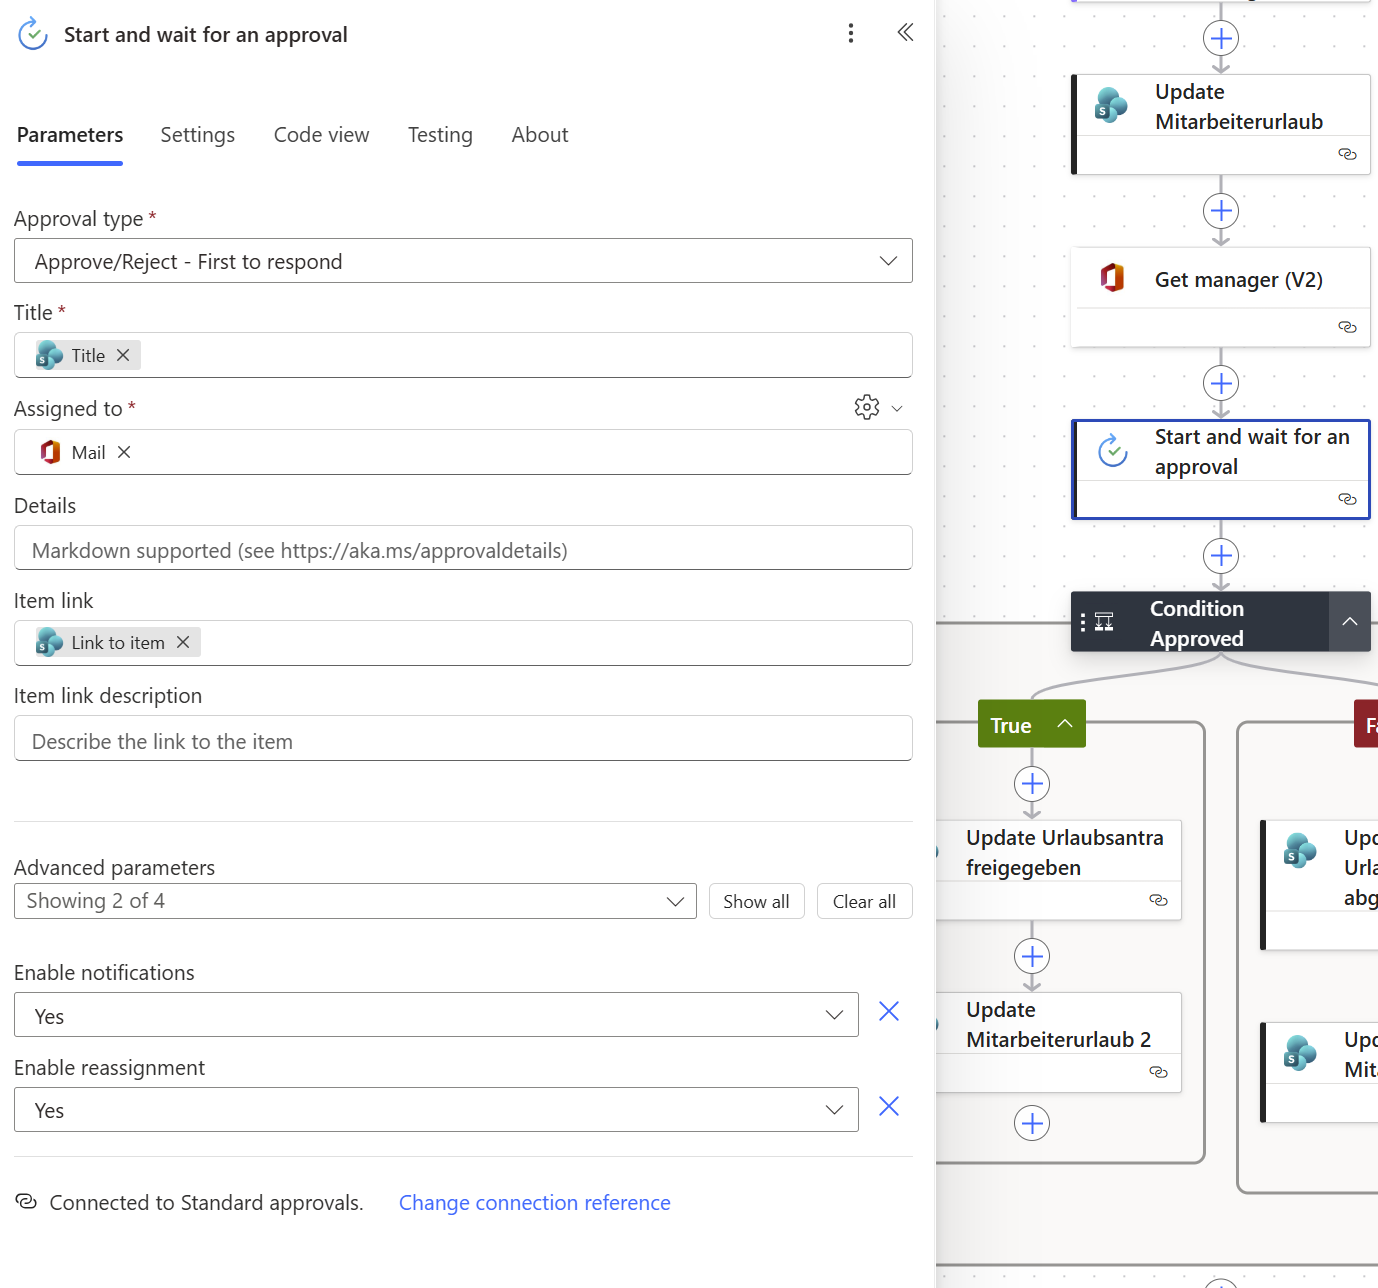
Action to send vacation approval request
Step 7: Update SharePoint (on Approval)
Depending on the approval result:
If approved:
- Status → approved
- Planned vacation decreases
- Approved vacation increases
- Remaining vacation recalculated
If rejected:
- Status → rejected
SharePoint Calendar View
For the best overview, set up a calendar view.
Settings:
- Start date: Start
- End date: End
- Subtitle: Status
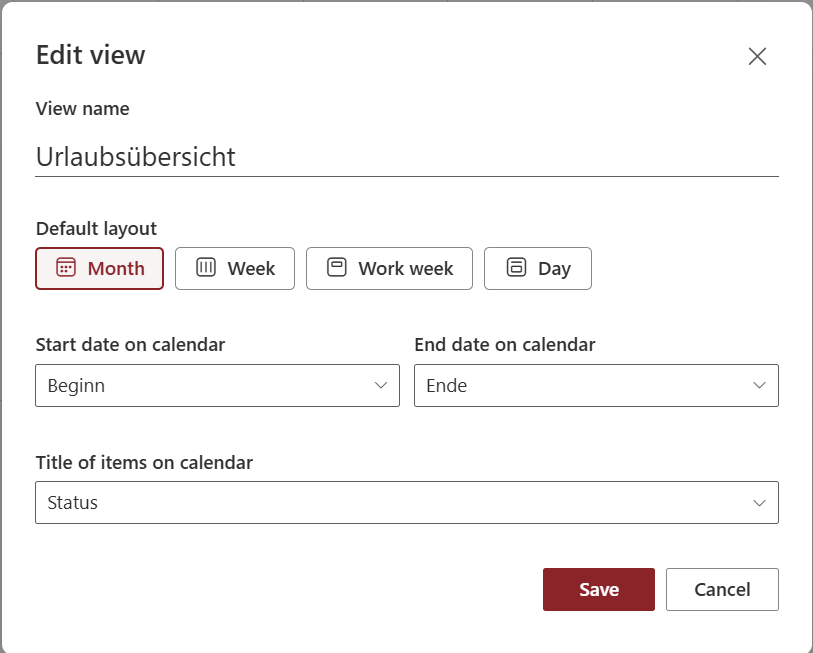
Calendar overview for planned and approved vacation days
Conditional Formatting
Under “Format current view,” you can add visual formatting:
- Requested → Yellow
- Approved → Green
- Rejected → Red
Testing & Useful Extensions
Additional optimization options:
- Secure SharePoint list permissions
- Automatically exclude weekends and holidays
- Integrate with HR/payroll systems
- Support individual work schedules
⬇ Download the Finished Solution
The complete import package can be found at:
jonaskufner.com → Downloads → Vacation Planner
The download links to the corresponding GitHub repository.
Thanks for Reading!
If you have any questions about the implementation or need support for Power Platform projects, feel free to get in touch.
